How to Set Up Ubuntu Linux 6.06 LTS LAMP Server
Many crinche at the thought setting up their own webserver. They think it’s terribly hard — and they’re right, to a certain extent. Until now, setting up a full-fletched LAMP server that actually works has been a task exclusively for the gifted. Well, no more. Regardless of your skill level, I will guide you through the entire installation process of Ubuntu 6.06 LTS Server, my favorite server distribution to date. It’s easy to use, it’s powerful, it’s secure, and it’s painless to configure.
The Ubuntu Server has no open ports after the installation and contains only the essential software needed to build a secure server.
Well, let’s begin!
Notice: The screenshots below may be obsolete, as the Ubuntu website has been redesigned. The other parts of this guide remain current (well, as current as Ubuntu 6.06).
Part 1: Preparing For Installation
Starting with the basics, we’ll find and download the appropriate ISO image for our system architecture. Then we’ll burn it and commence the installation process. If you’ve already downloaded and burnt the right ISO image, feel free to skip to Part 2: Boot-Up and Configuration. Be aware that “Ubuntu 6.06 LTS” is not the same as “Ubuntu 6.06 LTS Server”. They are two seperate images.
Getting the ISO Image
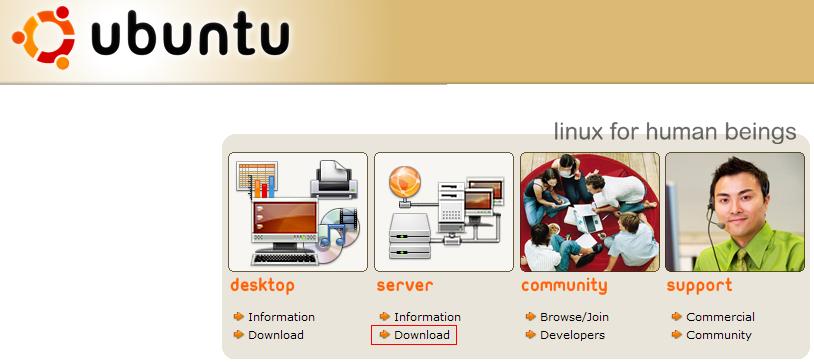 - First off, we’ll head over to Ubuntu.com and click the Server Download link.
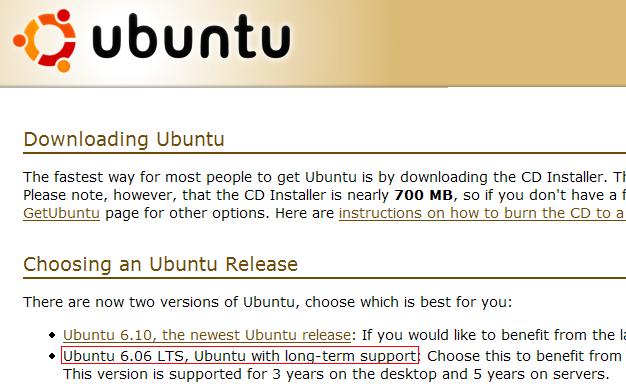 - On the Download page, select Ubuntu 6.06 LTS, Ubuntu with long-term support.
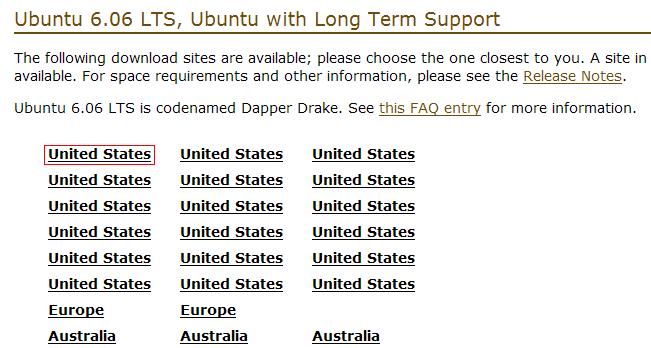 - Now select the region closest to you. Which you choose is irrelevant (they’re mirrors, thus no difference in content). I’ll select United States.
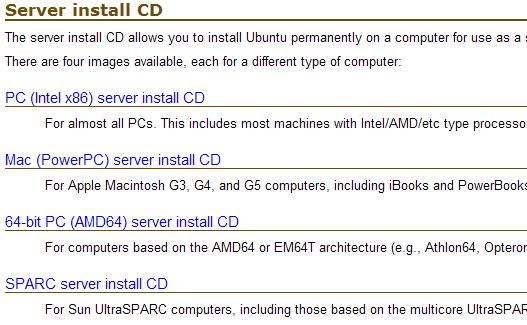 - Click on the respective download link for your system architecture. If you’re not sure what to get, chances are PC (x86) is the right one. If you’re running a Mac (NOT the ones with an Intel chipset), get the Mac (PPC) image. If 64-bit, get the 64-bit one, and so on. Please verify that you’re downloading your image in the Server section, not the Desktop, before continuing.
 Now grab a cup of coffee or a coke while you wait. You must.
Burning the ISO Image
Now that we’re done downloading the ISO image, we’ll use our favorite burning application to write the ISO to a CD-ROM. It is of utmost importance that you do not just copy the ISO file to a CD, but that you actually burn the image. Most writing applications have a feature called “Write Image”, “Write ISO to Disc”, “Burn ISO”, or similar. In Linux, the ‘k3b’ application (Nero equivalent) can do this with ease, so can Nautilus’ built-in CD writer (right-click the ISO in Gnome). Please see “How to Write ISO Files to CD in Windows” for Windows instructions, and “How do I burn an ISO image to CD in OS X? for Mac OS X instructions.
Get Ready to Install
When you’ve written the ISO image to a CD-ROM, please verify the contents of the disc. There should be several files and folders — if there’s only an .iso-file, you haven’t burnt the ISO. Please see the above instructions on how to burn it rather than copying.
If all looks fine, you’re done with Part 1! Let’s try it out in;
Part 2: Boot-Up and Configuration
Now that you’ve downloaded and burnt the Ubuntu Server ISO image, you’re ready to begin the installation. Go ahead and reboot your server with the CD in. If your system does not automatically boot from the CD-ROM, you’ll need to enable this in your server’s BIOS configuration. This option and the method to access it varies from BIOS to BIOS, but generally you’ll be able to enter the BIOS by pressing either F2 or DEL when your computer is starting up. When you’ve reached the BIOS configuration menu (usually blue), look for any option that states “Boot from CD-ROM” or an option that allows you to configure the priority of each drive. Some BIOSes are set to boot from the harddrive before booting from the CD-ROM. Change it so CD-ROM is the first thing your server tries, then save the settings and reboot.
 The screenshot to the right shows how my PhoenixBIOS is configured. The CD-ROM Drive is moved to the top, followed by Hard Drive and other network/removable devices.
 Booting Up
 Your server’s BIOS should now be set up correctly and should be booting from the CD-ROM drive. Hopefully you’re now seeing what is depicted in the screenshot to the right. Great! Now select Install a LAMP server and hit enter. You have begun the installation process.
 Configuring Regional Settings
You’re not very far from having a full-fletched server now. Hang on!
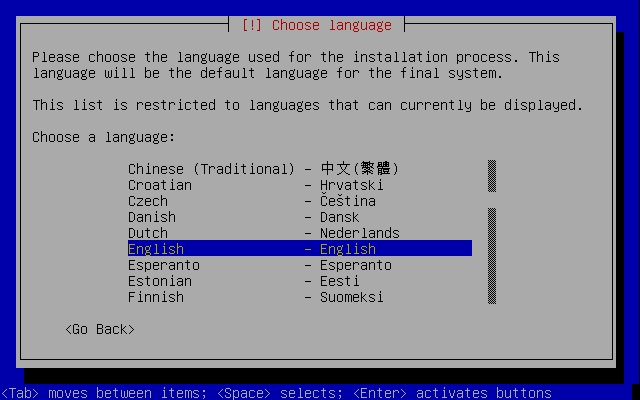 - Now we’ll select the language of our system. Be warned that this is not just for the installation, it is the language your system will use after installation, as well. This is, of course, changeable, but just go with the right language from the get-go. I’ll choose English (it’d suck for you if I chose my native tongue, Danish). Hit Enter.
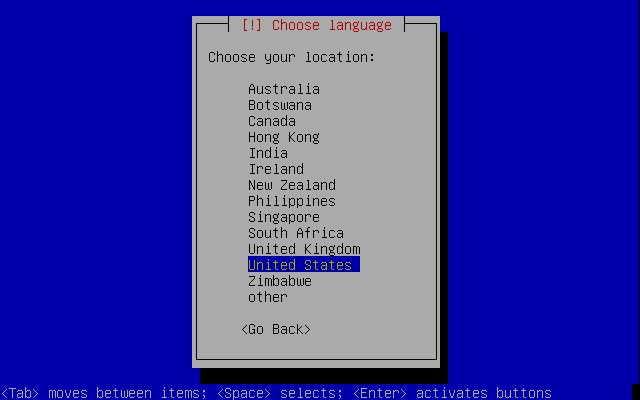 - Now, similarly, choose your location. The options vary depending on what language you chose in the previous step, so don’t be worried if you don’t see your country listed in the screenshot. If you select ‘other’ you will get a complete listing of languages. I’ll choose United States.
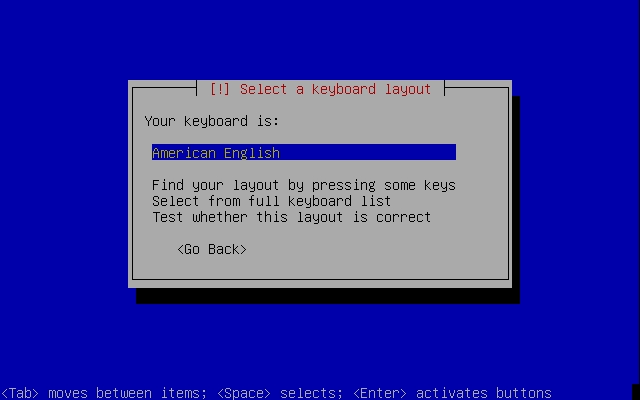 - The installer now asks for your keyboard type. The option displayed should be the correct one, so just hit Enter if it is. If not, try typing something or going through the list of keymaps.
The installer will now configure devices, load additional components, as well as load network hardware. In this How To, I’ll assume that you’re using either ADSL or DSL that does not require authentication. If you’re not, the installation will prompt you to enter the required information.
Configuring Networking
 - The installer will now ask you what you want to call your server. Call it anything you want, this can be changed later. I will call mine patricks-server. This is not your username, it’s the servers hostname. It’s what identifies the server on the network.
And the installer detects more hardware…
Congratulations, you’re done with Part 2. Get ready for the hardest part, partitioning. Don’t worry, I’ll take good care of you.
Part 3: Partitioning Your Drives
This is the single hardest part to guide anyone through, remotely. All system setups are different so it’s hard to tell you exactly how to set up your system. Whether or not you’re going to be using LVM, how many partitions to make, etc.
 - The standard options are pretty straight-forward, and I recommend you choose one of them if this process scares the living hell out of you. If you do choose one of them, feel free to skip to Part 4: Completing the Installation.
For the rest of this section, I will show you how I set up my system by manual partitioning. Please take my setup loosely — if there’s something that doesn’t fit you or something you’d prefer, adjust accordingly!
Manual Partitioning
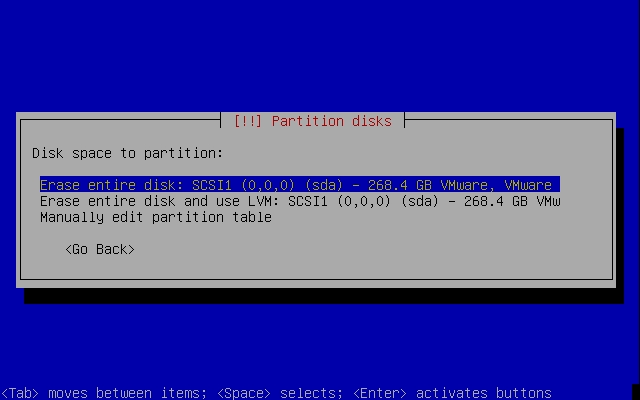
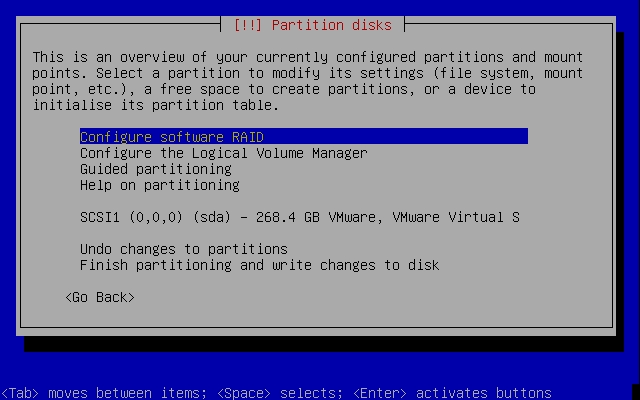 - This is the manual partitioning menu. The first two options (if they are shown) will allow you to set up a software RAID and Logical Volume Management. These, if you need them, will have to wait until we have configured our partitions. I will not be configuring either, as they are both unique to each configuration and pretty straight-forward to set up.
  - I have one harddrive, SCSI1 (0,0,0), a 268.4GB drive. To partition this drive, I’ll highlight it and hit Enter. A dialog will appear, asking me if I would like to create a new partition table, that will delete anything currently on the drive. I’ll hit Yes.
 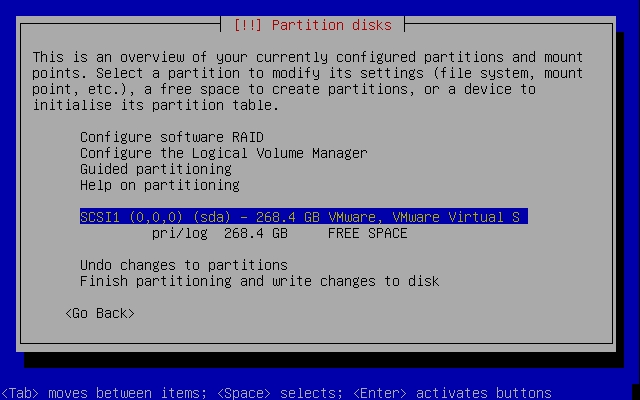 - This is the menu after deleting all partitions on the drive. Now I’m ready to set up new partitions.
  - Select the “FREE SPACE” entry below the drive and hit Enter. You can choose to let the installer set up partitions automatically, or you can make them yourself. I’ll select Create a new partition.
 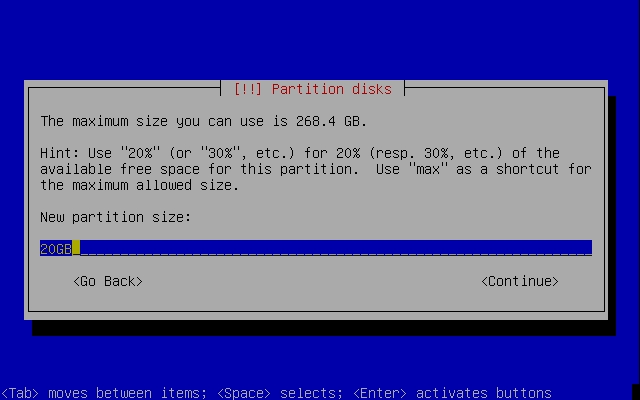 - Our first partition will be the root ( ‘/’ ) partition. This is where all our system files and applications are stored. If you want, you can allocate a percentage of the drive to root, and leave the rest for the ‘/home’ partition. I’d recommend something inside the 15-25GB range for a root you’re going to be using for a long time. Seperating your root and /home is useful if you need to re-install Linux. I’ll assign 20GB to root.
 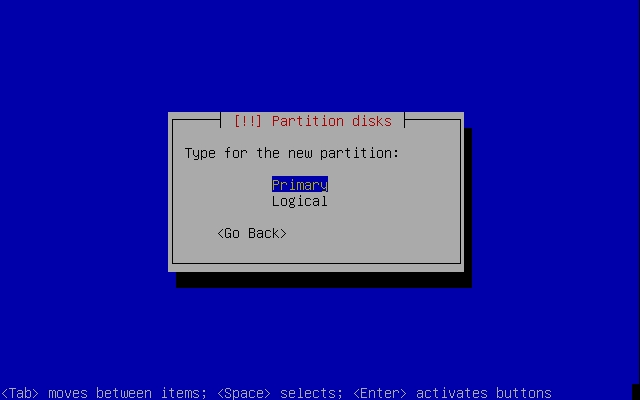 - Unless you’re going to have more than 4 partitions per drive, select Primary here. Logical partitions are ‘fake’ partitions created to circumvent the normal limit of 4 partitions.
 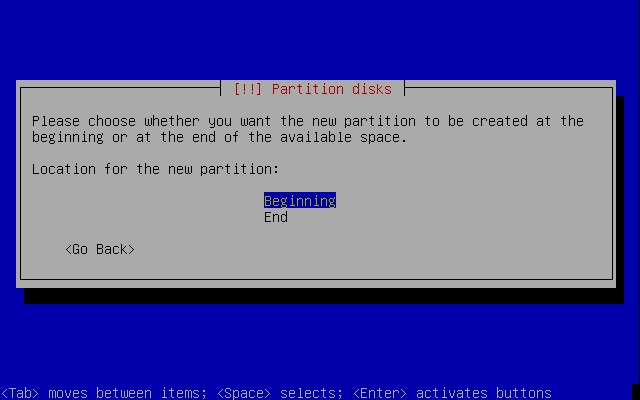 - Select Beginning. This tells the installer to position our root partition at the start of the available space.
 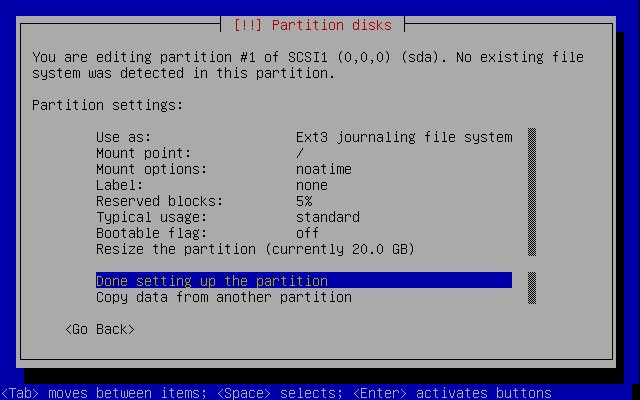 - You can choose to leave everything as it is here. A little tweak: In Mount Options you can choose to turn ‘noatime’ on, which will give you a significant speed boost. It disables generating a new time stamp every time a file is accessed. When you’re happy, select Done setting up the partition and hit Enter.
 Additional Partitions
Now that you know how to set up a new partition, do the following:
Following the same instructions as before, create a partition in the free space with a size roughly equal to half of your RAM, e.g. 512mb if you have 1GB of RAM. Make it a Primary partition as before, in the Beginning of the free space as well. When you get to the confirmation dialog, highlight the file system type (Use as:) and hit Enter. Select swap area from the menu. Accept the changes. The swap area acts as a substitute if all available RAM is being used.
Finally, create another partition, but /home rather than /. Ubuntu should automatically suggest this. Have this partition use the remaining space on your drive. Again, you can choose to enable ‘noatime’ to get a performance boost.
Verifying and Finalizing
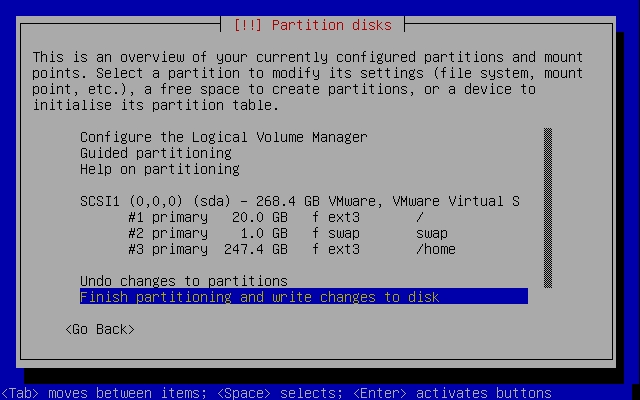 Your partition table should now look like this (or be similar). If you’re missing the swap space or the /home partition, don’t worry. You can mess around as much as you want. If all goes wrong, delete the entire partition table by selecting the drive itself, and start over.
If you’re all done, hit Finish partitioning and write changes to disk. A confirmation dialog will appear, asking you if you’re sure you want to apply these changes. Double-check the settings and hit Yes if it looks right.
You’re all done with partitioning! Get ready for the fun stuff in
Part 4: Completing the Installation
Now that you’re done partitioning, it’s time to complete the installation!
Setting Up the Timezone
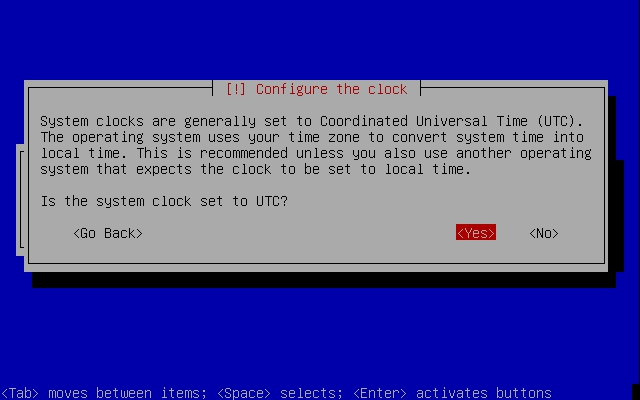 - The installer will ask you what timezone you’re in. Select the one that best fits you and continue. I’ll choose Eastern. If you are prompted to use UTC, hit Yes (unless you have a reason not to).
 Users and Passwords
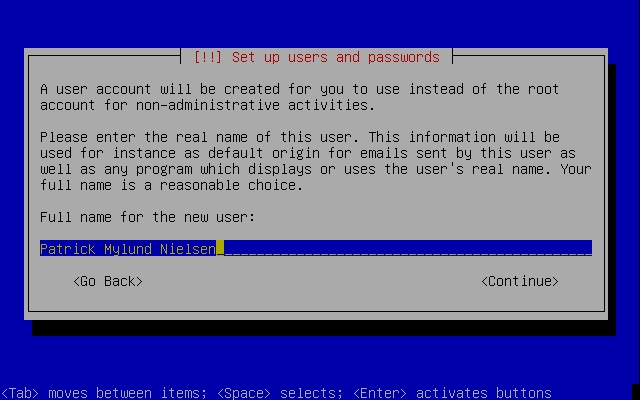 - The first dialog after having entered the timezone asks you for your real name, not the alias you want to log in with.
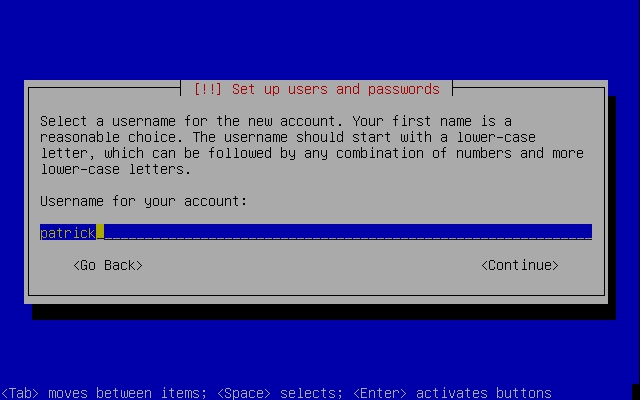 - Now I’m asked for my desired username. The username should start with a lower-case letter, which can be followed by any combination of numbers and letters. The installer suggests patrick. I’ll go with that.
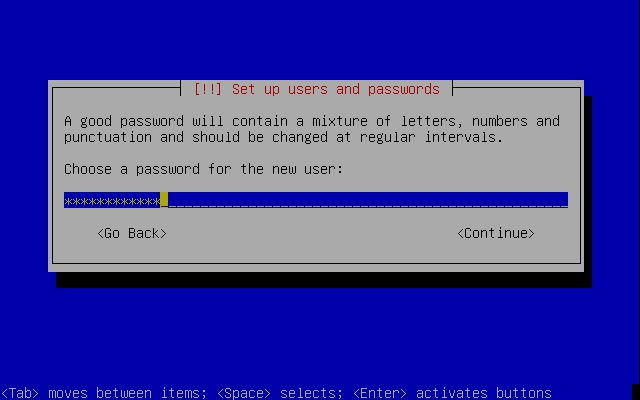 - Enter the password you’d like to associate with your account. This password will also be the password you use to perform actions that require ‘root’ access. In the next window, confirm the password by typing it again.
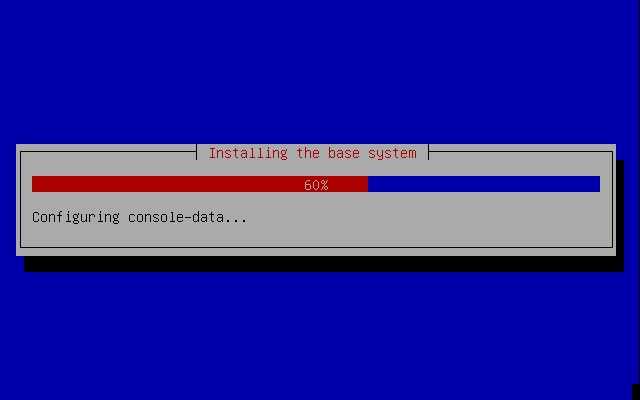 Sit back and relax as the installer completes installing Ubuntu Server on your computer. Let the installation process finish, eject the CD, and reboot your system. Congratulations, installation is done!
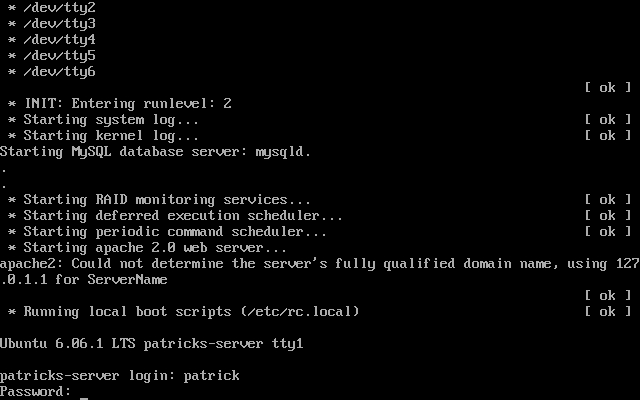 Linux should now initialize and prompt you for your username and password. If your screen looks something like this, all went well. Feel free to log in.
Setting up LAMP
 Wouldn’t it be great if our LAMP server just worked now, without us having to do anything? Well, it does! Try browsing to your servers IP in a browser, in my case http://192.168.0.6. Woot!
It’s time to do a few changes to our LAMP server. Normally, this would be a 3/4-hour process of manually editing config files and testing. Thanks to Ubuntu though, the installer does it all — better too. All we need to do is choose how we want our LAMP server to work.
By default, Apache2 uses /var/www/ as its document root. We’ll want to change this to our home folder in order to reap the space we’ve allocated.
- Log in, in case you haven’t. Type the exact command mkdir www - This will create the folder /home/patrick/www/ which we will be using as the document root of our server.
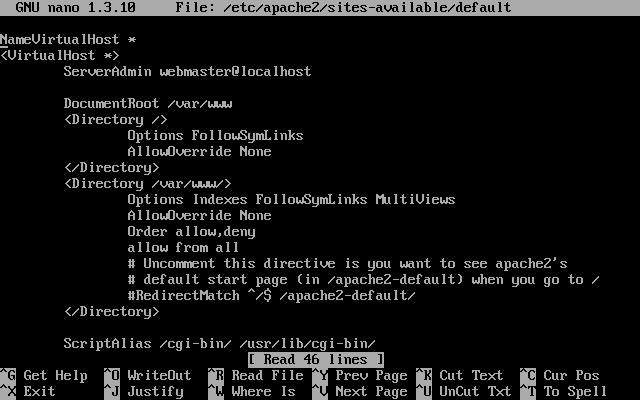 - Type the exact command: sudo nano -w /etc/apache2/sites-available/default and hit Enter. You will be prompted for your password. Enter it, and a text editor with our site’s config file will open (see screenshot to the right).
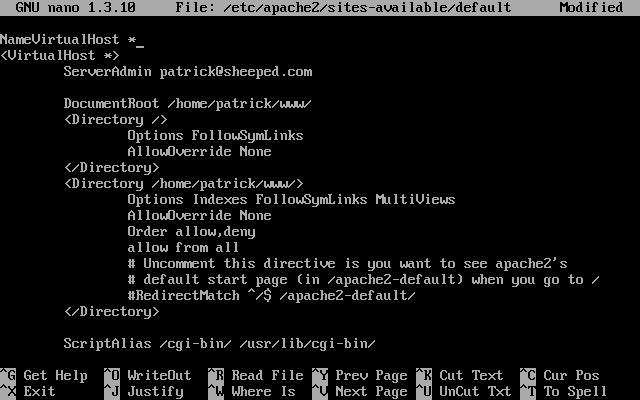 - Feel free to set the administrator e-mail to your own. Now, go through the document and replace all occurrences of /var/www/ to /home/patrick/www/, where ‘patrick’ is the username you chose during the installation. Navigate around with the arrow buttons. When done, hit CTRL+X then type Y and Enter to save the changes.
- Time to restart Apache to apply the changes. Type sudo /etc/init.d/apache2 restart
- Now, let’s see if this really works! Assuming you’re in your home folder (type cd to make sure), type cd www followed by ls. You should see.. nothing. Good.
 - Type nano -w index.php We’ll create a sample PHP script to test if the server and PHP is working.
 <?php echo “It’s working!” ?> will suffice. Again, hit CTRL + X followed by Y and Enter to save the contents.
 - Navigate to your server, e.g. http://192.168.0.5 — it works!
You’re done! Your server is working perfectly!
If you’re uncomfortable with the command-line interface, I recommend you look into guides for installing Webmin and phpMyAdmin for Ubuntu. Also, if you would like to administer your server from your own computer, you can install SSH with the command: sudo apt-get install ssh You can access it with applications like PuTTY.
In order to install phpMyAdmin (and more) with sudo apt-get install, you will first need to enable the universe repository. There’s a nice guide on how to do that from the CLI here.